Showing posts with label cake. Show all posts

Sunday, March 11, 2012

The BEST Brownie Recipe - goodbye Betty Crocker!

 I have tried SO many brownie recipes to try and find the perfect brownie recipe for my sister.
She's a boxed brownie fan and it seemed like nothing as going to steer her from Betty Crocker. 
You see, she's the Goldilocks of brownies.

These ones are too cakey
Those ones aren't dense enough
They just aren't the same

But you know what? these brownies are jusssssssssssssssssssst right!
I finally came up with the best brownie recipe and Betty Crocker got the boot!


These brownies are super simple to make and only require a mixing bowl. 
It's a small batch recipe, making 16 small or 9 large brownies so feel free to double it! 

The Best Brownie Recipe
also known as the only brownie recipe you'll ever need 
makes 16 small/9 large brownies

115g butter, melted 
1C brown sugar
1 tsp vanilla extract
2 eggs
1/2C flour 
1/3C cocoa powder
1/4 tsp baking powder

Preheat oven to 180*C/350*F
Grease and line 9x9'' brownie tin.
Combine melted butter, brown sugar and vanilla in a mixing bowl.
Once butter mixture is cooled slightly, add eggs and stir until mixed through
Mix in flour, cocoa powder and baking powder until well combined.
Pour into tin and bake for 20-25 minutes, or until a skewer removes clean.


This brownie recipe is super simple to adapt, 
I added Reese Peanut Butter Chips but you can add nuts/chocolate/chopped candy bars or whatever you fancy!
They're delicious on their own or with a creamy chocolate frosting on top - it's up to you! 

So tell me - your dream brownie, what's it like?
Chewy? Fudgy? Cake-like? Nut filled? Super rich?
 Pin It

Wednesday, November 2, 2011

Granola Breakfast Muffins and a bunch of breakfast goodies!

Breakfast is by far my favourite meal of the day.
I can't understand how people can say they just don't like breakfast.
If I started without it, I'd probably be a zombie for the rest of the day.

So, as you could imagine, I was super excited to receive the package from realgoodfood,
filled with breakfast goodies as well as a whole bunch of other fantastic products. 
So many products, in fact, they won't fit into the one post!
Plus, I also have a delicious recipe for you at the end of the post!


The Organic Oat Porridge is a Wheat Free Mix of Biodynamic and organic rolled oats, sultanas, apple and cinnamon.
It has no added oil, sugar or salt and is GMO free!


It can be made hot on the stove (or in the microwave) as a porridge, 
but now as the weather is warming up, I love to use it as a base for overnight oats!
Just mix up the oat porridge with milk or yogurt (or a combination of both) and leave it to soften in the fridge overnight.
In the morning, all you have to do is pull your breakfast out of the fridge, add any extra toppings you might like and eat up!
Fast, easy and delicious :)

The Choc Berry Street Mix is a fantastic snack to keep around and it's also Gluten Free!
This organic snack mix is filled with sultanas, almonds, cranberries, blueberries, goji berries, sunflower seeds, pumpkin seeds and delicious dark chocolate pieces.
The mix also makes a fantastic topping for oatmeal or overnight oats!


The Organic Street Mix is also gluten free 
 and filled with organic sultanas, almonds, sunflower kernels and pumpkin seeds.
It's a perfect on the go snack for when the hunger monster attacks!

The Organic Bircher Muesli is a wheat free mix of organic & biodynamic rolled oats, sultanas, dried apple, almonds and sunflower kernels.
Bircher muesli is a lot like overnight oats, some people like to soak theirs in fruit juices or water and top with milk or yogurt the next day, while others prefer to use milk or other combinations.
Ultimately, the decision is yours! Play around with different combinations until you find what you like!

You can get realgoodfood products from a variety of stockists across the country!


 Now, the recipe I promised!
As soon as I opened the Organic Toasted Muesli I was hit with the delicious aroma of honey and new it'd be perfect in baked goods!
It's a mix of organic & biodynamic rolled oats, sultanas, honey, sunflower kernels, almonds, barley malt, pear juice and orange.
It's delicious eaten as a cereal, but I decided I wanted to make a way for busy breakfast-haters to enjoy it too!

Thus, the breakfast muffin was born!
It's a perfect on the go breakfast that's fuss free and delicious!
The recipe is also completely adaptable, so it's easy to whip up with whatever you have at hand.


Muesli Breakfast Muffins 
makes 12 muffins or 6 extra large muffins


2 1/2C Flour (you can use white/whole wheat/GF/spelt)
2/3C Sugar (choose whatever sugar you prefer - white/brown/raw etc)
1C toasted muesli/granola + extra for topping
1 egg
1C fruit* 
1/4C vegetable oil 
1 1/4C milk 

Preheat oven to 180*C. Grease/spray muffin tins with oil or line with paper cases.
Combine flour, sugar and muesli in a bowl. 
Mix together egg, vegetable oil and milk and pour into dry ingredients. 
Stir in fruit and mix until just combined. 
Pour muffin batter into muffin tins and top with a sprinkle of extra muesli. 
Bake for 20-25 minutes or until golden and a skewer inserted in the centre comes out clean.


*For the fruit, I used a cup of leftover pie apple from a pie I had made earlier - just cooked apples mixed with a pinch of brown sugar and cinnamon 
You can use any fruit you like canned, fresh or frozen apple/pear/peaches/pineapple/blueberries etc.


So tell me, 
Are you a breakfast lover?
What's your go-to breakfast of choice?

Stay tuned for the other half of my review! It's packed full of delicious gluten free goodies :)

Kristy received these products courtesy of www.realgoodfood.com.au
If you'd like a review of your products, send an email to ksayerphotography@gmail.com 
Pin It
 

Wednesday, October 26, 2011

Looking for a last minute Halloween treat?: Swirled Bundt Cake

Halloween is this coming Monday - are you ready?!
In recent years, Halloween has become more popular in Australia, with carving pumpkins stacked in big crates at the supermarket and costumes selling like hot cakes.

I decided to make a Halloween themed Bundt cake to kick off the holiday early.
This cake is perfect for Halloween parties and is super simple!
I mean, really, eating brains just isn't my thing - nor is spending the entire weekend slaving away in the kitchen over halloween themed treats.
Plus if you get an invitation last minute, this cake is your best friend!


Vanilla Bundt Cake Recipe
makes 1 large bundt cake

250g butter, softened
1 3/4C sugar
2 tsp vanilla
4 eggs 
3C plain flour
1 tsp baking powder
1/2 tsp baking soda
1C buttermilk*  

Preheat oven to 180*C (350*F)
Cream butter and sugar until light and fluffy.
Add in vanilla and eggs one at a time until combined.
Add in flour and milk alternatively, with mixer on a low speed, until just combined.
Separate half of mixture into a clean mixing bowl.
Colour one batter bowl with purple food dye (or a combination of blue and red dyes) and the other with orange dye (or yellow and red) - the colours should be really bright as they will fade during cooking.
Pour in 3/4 of the purple batter into the bundt tin, being sure to cover the entire base.
Gently pour the orange batter on top of the purple batter, towards the center, leaving about 1 cm of the purple batter on the edge.
Pour in the remaining purple batter, trying to cover as much of the orange as possible.
Place the filled bundt tin into the oven and bake for ~ 1 hour, until the tip of a knife or skewer inserted into center of cake comes out clean.
Leave cake to cool before turning out and leaving to cool completely on a wire cooling rack.

*If you don't have buttermilk, you can use milk soured with 1 tsp white vinegar or lemon juice

Drippy Milk Chocolate Glaze
200g Milk Chocolate 
2-3 tsp Vegetable Oil 
(the oil will depend on the chocolate, add as much as needed to get a slightly runny consistency)

Melt chocolate and oil on a low heat until completely melted.
You can do this on the stove (bain marie technique) or in the microwave - just be sure not to burn the chocolate!
Place the cooling rack with the cooled cake ontop of a lined cookie sheet and pour the chocolate glaze on the top of the bundt cake, allowing the glaze to drip down the sides. 
Leave cake to set at room temperature or in the fridge (if you're impatient!) 

and there you have it! easy as easier than pie! 


So tell me! 
Do you celebrate Halloween?! 
What are your plans this year?
Pin It

Saturday, October 1, 2011

Recipe: Key Lime Pie Cupcakes


When your Mum comes home from a trip to your Grandmother's house with a big bag of fresh limes,
What do you do?
You switch on your brain and start figuring out what you're going to bake with them, of course!

While I may have given up gluten for now, you don't think I'd stop baking - did you? 

The first thing that came to mind when I saw the limes was key lime pie,
but lately I've made quite a few pies so I felt like making something different.
I remembered I hadn't made cupcakes for a while and then the idea hit me...
Why not take a Key Lime Pie and turn it into cupcakes?

Then I set off to create Key Lime Pie Cupcakes or Lime Meringue Pie Cupcakes - whichever name you fancy.
I took my favourite, tried and tested Vanila Cupcake recipe,
made a simple lime filling and topped it off with a soft meringue.

For something that looks a little fancier than your average cupcake and will wow your guests,
it's delightfully simple - just how I like it!


Key Lime Pie Cupcakes 
recipe by ksayerphotography
Makes 12 cupcakes

Vanilla Cupcakes:
125g Butter, softened 
2/3C + 2 tbsp Sugar
2 Eggs 
1/2C Milk 
1/2 tbsp Vanilla Extract
1 1/3C Plain Flour 
3/4 tsp Baking Powder
1/4 tsp Salt

Preheat oven to 160*C (320*F).
Beat butter and sugar until light and fluffy. 
Add in eggs one at a time, beating for a minute after each egg. 
In a bowl combine milk and vanilla.
In a separate bowl combine flour, baking powder and salt. 
With a mixer on low speed, alternatively add the flour and milk mixtures until all is combined. 
Beat for a further 3 minutes on high.

Divide into lined cupcake pans and bake for 20-30 minutes or until golden and a skewer inserted into the middle comes out clean.
Using  piping nozzle, skewer or small knife make a hole in the top of the cupcakes for the filling.
Allow to cool in the pans for 10 minutes before removing to cool completely on wire racks.
Key Lime Filling:
100g Condensed Milk
1.5-2 Tbsp Fresh Lime Juice  
(this depends on your taste preference and the strength of your limes)
Mix condensed milk and lime juice together until combined and desired flavour is reached. 
Fill/pipe filling into cooled cupcakes.

Meringue Topping:
2 Egg Whites
50g Caster Sugar
Pinch of Salt

Preheat oven to 230*C (450*F)
Beat the eggs and salt until soft peaks form.
Gradually add the sugar and beat until stiff peaks. 
The mix should be thick and glossy and the sugar should be completely dissolved.
Pipe onto cooled and filled cupcakes and bake for 5 minutes until meringue is golden.
...

And there you have it! 
It seems a bit more complicated than it actually is, but trust me, it's as easy as... well, pie!

Tips:
- Add the lime juice gradually and taste as you go so you don't add too much!
- It's easier to cook the meringue topping if you place the cupcakes back into the cleaned cupcake tins
- This recipe can be easily adapted! Switch the lime juice for lemon, fill them with chocolate or caramel instead - the possibilities are endless!

So tell me -
Do you have any favourite recipes using lime?

Friday, April 22, 2011

Vanilla Cupcakes for an Egg-cellent Easter


Hey, it's Easter - I'm allowed to throw in a little cheesyness ;)
Last night I whipped up these little beauties for our little Good Friday dinner. 

They might look like your run of the mill vanilla cupcakes, 
but I'm pleased to say this may just be the Best Vanilla Cupcake recipe ever.
It's a bit of a frankenstein recipe - pulling bits and pieces of recipes together to create the ultimate one!
But rest assured, you'll have 12 yummy cupcakes by the end of the process.


BEST EVER Vanilla Cupcakes 
recipe by ksayerphotography
Makes 12

125g Butter, softened 
2/3C + 2 tbsp Sugar
2 Eggs 
1/2C Milk 
1/2 tbsp Vanilla Extract
1 1/3C Plain Flour 
3/4 tsp Baking Powder
1/4 tsp Salt

Preheat oven to 160*C (320*F).
Beat butter and sugar until light and fluffy. 
Add in eggs one at a time, beating for a minute after each egg. (Don't worry if your mix looks slightly curdled, it'll come together - I promise!)
In a bowl combine milk and vanilla.
In a separate bowl combine flour, baking powder and salt. 
With a mixer on low speed, alternatively add the flour and milk mixtures until all is combined. 
Beat for a further 3 minutes on high.

Divide into lined cupcake pans and bake for 20-30 minutes or until golden and a skewer inserted into the middle comes out clean. Allow to cool in the pans for 10 minutes before removing to cool completely on wire racks.
----

Though, if you do make this recipe - you may want to double it... or triple it... or quadruple it.
The cupcakes will vanish in a flash!

I frosted the cupcakes in a basic buttercream and then topped them with some candy coated easter eggs and sprinkles and there you have it - simple easter cupcakes :) 

So tell me,
Do you have any special Easter traditions?


Monday, April 11, 2011

The ultimate chocolate cake?

"Kristy this is the best chocolate cake you have ever made"

That sentence is one that is quite shocking.
You see, my sister is a bit of a brownie snob and this carries over into chocolate cakes as well.

She's stuck on just one recipe.  
Her recipe she randomly found on the web and uses every. single. time.


To be honest, it's not even that great of a recipe.
It usually ends in disaster - either an overcooked brownie or a ridiculously undercooked brownie and quite commonly, it sinks.
But it still remains the best brownie recipe ever according to the creature of habit.


So when I received this Chocolate Mud Cake Mix from Well & Good,
I decided its fate was to stand the ultimate test.

To give the cake the best chance of winning her approval,
I decided it was best to hide the packet.
A fifteen year old would surely turn her nose up as soon as she read the words..

Gluten free
Wheat free
Nut free
Fructose friendly
Dairy free
No Trans Fat
GMO free
No Artificial Colours or Flavours
Halal
Kosher


So I baked away while she was at school, photographed and she came home to a chocolate cake precariously perched on the benchtop, awaiting its demise.

It was fudgy in the centre with a slightly chewy crust - just like the perfect brownie.
All it needed was a dusting of icing sugar to be complete.

"Ooooh what's this? Did you bake this today?"

I quickly weaved a little white lie, telling her I'd whipped up a Martha Stewart creation, before handing her a plate and a piece of cake.


She took a bite and that's when we heard...
"Kristy this is the best chocolate cake you have ever made"

My mum looked at me in shock,
my ego took a little dive (beaten by a packet mix!)
and I burst into laughter before pulling the packet from the cupboard.

"What's that? Wait.... this is from that?!"

The truth was out and her opinion stayed the same.
The only thing she was worried about was whether we could buy more!
 Luckily, all I have to do is look up the retailers.

Though, being as determined as I am, this cake mix has sparked the..
Ultimate Chocolate/Brownie Cake Challenge

 But I do have to say - go out and get yourself one of these mixes and bake it ASAP
You won't regret it - afterall, it passed the creature of habits ultimate taste test.

But do tell me!
Do you have a recipe you're stuck on using and won't budge on?
and Do you have a chocolate cake recipe you think is the best ever?!
I need suggestions!

Kristy received these products courtesy of www.wellandgood.com.au
If you'd like a review of your products, send an email to ksayerphotography@gmail.com

Tuesday, March 1, 2011

COMPETITION: Deliciously Simple and Coeliac Awareness Week

Even the best of chefs have kitchen disasters.
Cakes that fail to rise, muffins with doughy centres, ingredients knocked off the kitchen counter, spoiled milk, misinterpreted recipes,  faulty kitchen equipment - you name it, it happens. 

Gluten free baking can be a bit of a disaster if you're not used to it. 
Unfamiliar ingredients and textures can often lead to lacklustre cakes and gummy brownies. 
For alot of people with Coeliac disease, baking is forgotten about. 


But Melinda's Gluten Free Goodies makes it super easy, you could even say fool proof!
Take the Lemon Curd Delights I made above, all you have to do is melt and mix! 
Plus, no one will ever know it's not homemade unless you tell them ;) 
I got plenty of compliments from my taste testers who couldn't believe they'd come from a packet.

Coeliac Disease effects one in every 100 Australians, however, fewer than one in five have been diagnosed.
That means that up to 200, 000 Australians have coeliac disease and have no idea. 

So what is Coeliac Disease? 
It's the result of an auto-immune response where the body produces antibodies which attack it's own tissues. This response is triggered by eating gluten - a protein which is found in wheat, rye, barley and oats.

Those with coeliac disease may experience: 
- Fatigue
- Unexplained anaemia
- Nutritional deficiencies such as B12, iron or folate
- Gastrointestinal problems
- Nausea and vomiting
- Unintentional weight loss 
- Delayed growth or development in children
- Headaches
- Liver problems
- Unexplained multiple fractures
- Irritability
- Trouble concentrating

You may also have a higher risk of having coeliac disease if you have:
- a family history of coeliac disease
- type one diabetes 
- unexplained osteoporosis
- infertility or multiple miscarriages

So how do you find out if you have Coeliac Disease?
Have a talk to your doctor if you're concerned and a Coeliac Blood Screening test can be ordered and the correct measurements can be taken from there.

What happens to people with Coeliac Disease?
The good news is that Coeliac disease can be treated quite easily, with the removal of gluten from the diet.   


 Melinda's Gluten Free Goodies have just released an app called Gluten Free Entertaining to help you out when it comes to cooking for yourself or others on a Gluten Free diet. 

This should hopefully help you to avoid any kitchen disasters!
But now, lets get to the fun part!

I want you to try Melinda's products too! and so does Melinda herself!
So we're offering you the chance to win over $100 worth of MGFG delivered to your door! 
 
All you have to do is comment, telling me about your worst kitchen disaster
or your ultimate cooking triumph! 

and to gain an extra entry like and post "I want to win MGFG with ksayerphotography" at Melinda's Gluten Free Goodies Facebook page page

The winner will be chosen by Melinda and announced here and on MGFG's Facebook page on April 4th

(Open to AUS residents only - Sorry!)
 
Non-blog readers: Leave a comment to win and send me a copy at ksayerphotography@gmail.com
so that I have your contact details if you win!

Kristy received MGFG courtesy of www.melindas.com.au
If you'd like a review of your products, send an email to ksayerphotography.blogspot.com 


Saturday, November 27, 2010

Happy birthday blog!


that's right! 
One year ago today I started my little blog :)

I've grown a lot in a year, as has my blog - and I'd like to think my photography has too!
My first ever post was a picture and a caption, and that's it. 
I didn't write anything because I never thought anyone would find my blog.

Little did I know the seemingly giant internet isn't so giant afterall. 
Soon enough people started reading my blog and commenting - and I was shocked.
Why would you want to look at my pictures? or read what I thought?
Surely I wasn't interesting! 

In the past year I have met some of the most incredible people. 
Bloggers who have become fantastic friends,
food manufacturers who have helped me out as I've helped them out,
marketing people who have kept me "in the loop"
and readers whose comments make me smile to no avail. 

I am so grateful for each and every person who reads my blog. 
I don't know where I'd be if I hadn't started blogging,
who knows If I'd have continued with my photography in the way I have.
I wouldn't have had the opportunities I have had, or met the people who inspired me to keep pushing forward
and I wouldn't have the fantastic friends I have today.

So thank you,
from the bottom of my heart.
If I could, I'd bake you all cute little cupcakes
but for now I guess a picture will have to do
(hopefully I'll still be blogging when they come up with cool technology where you can get a cupcake from the computer - but until then I OWE YOU :D)

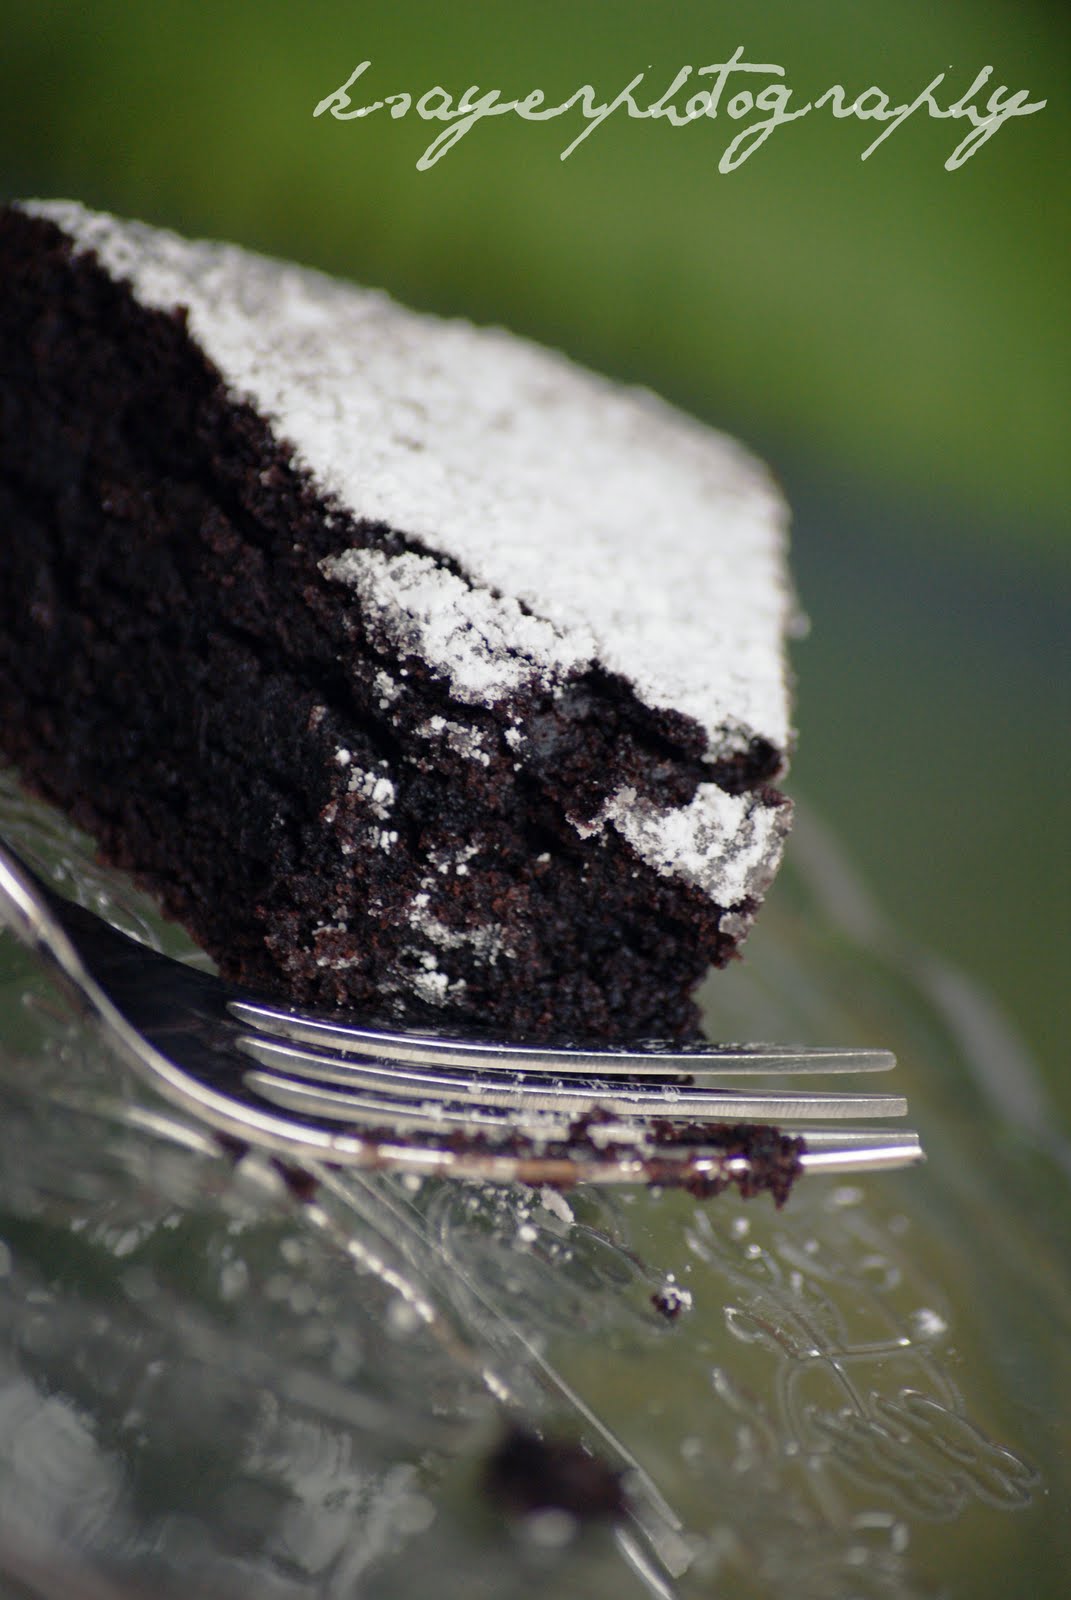
So, I decided my blog needed some cupcake love on its birthday.


I had been sent a bunch of Melinda's Gluten Free Goodies baking mixes to review  
and these Sweet Caramel Cakes seemed PERFECT! 

I've had a few friends who were Coeliacs and I experienced just how hard it can be to cater for specific dietary needs. 
I remember going to birthday parties with my coeliac friends who had to bring their own food and cakes to enjoy
and fussing over recipes for dinner parties where my coeliac friends were in attendance. 

These mixes make it so easy! 
and unlike alot of gluten free products - they taste fantastic!
They'd be perfect to whip up for an afternoon tea with your coeliac friends. 

Each box has a cake premix and a sachet of rich gooey caramel 
(really, it should contain two sachets of caramel so you can eat one yourself :P) 
and all you have to do is add eggs and butter. 

One tip though, 
make sure you grease the tins REAAAAAALLLY well or they'll stick - and you'll be presenting your friends with separate cupcake tops and bottoms  
(though, if they're like me and love crunchy tops - you can pretend it was intentional)

They're gluten free, wheat free and yeast free
and so so yummy!

 One of the first thing I did after trying the cakes was email my coeliac friends to let them know how good they were!
and it's so easy to get your hands on some
Head to your local Franklins, IGA or Woolworths
Have a look at your nearest health food store
 or head to one of the many online stores that stock Melinda's products.

..

Now, I'm hoping that next year I'll still be blogging
and celebrating ksayerphotography's SECOND birthday
and I hope you will all be with me too!
Once again thank you so so so so much
for inspiring me
encouraging me
reassuring me
supporting me
and helping me to create opportunities for my photography to grow and expand.

Here's hoping for a bigger and brighter future for ksayerphotography
filled with exciting new adventures! 

But do tell me,
What's your favourite dessert treat? 
and How do you celebrate your birthday? any traditions?

Kristy received Melinda's cake mixes courtesy of www.melindas.com.au
If you'd like a review of your products, send an email to ksayerphotography@gmail.com