Showing posts with label sweets. Show all posts

Sunday, April 22, 2012

Mother's Day


There is no one in the world quite like your Mum.
They're there for you no matter what, they pick you up when you're down -
dust you off, fix you up and put you back on your feet.

My Mum is my best friend. 
I'm one of the lucky daughters who can have both a mother/daughter relationship and a best friend relationship with their Mum - and I couldn't ask for anything better.


Sunday, May 13 is Mother's Day - the day where you really should spoil your mum, grandma or whatever special lady in your life. 
Sure, I believe they should be spoiled every day - but we're all human and we often get lost in our own little worlds and forget to show our appreciation for the ones we love.


And what better way to spoil your Mum (or whoever!) than with a gorgeous box of chocolates?!
Butler's Chocolate Selection is perfectly wrapped for Mother's Day and tied with a pretty pink ribbon.
Once your Mum opens the box, she'll find their luxury Irish chocolate truffles and pralines 
with flavours like walnut ganache, chocolate flake, crispy praline and raspberry sorbet.

You can buy the chocolates online or from a number of stockists around the country - just see their facebook page to find out your closest store!

So tell me, 
What's the best thing about your Mum? 
and what's your favourite chocolate flavour?

Kristy received Butler's Chocolates courtesy of www.kingstonfoods.com.a
If you'd like a review of your products, send an email to ksayerphotography@gmail.com


Sunday, March 11, 2012

The BEST Brownie Recipe - goodbye Betty Crocker!

 I have tried SO many brownie recipes to try and find the perfect brownie recipe for my sister.
She's a boxed brownie fan and it seemed like nothing as going to steer her from Betty Crocker. 
You see, she's the Goldilocks of brownies.

These ones are too cakey
Those ones aren't dense enough
They just aren't the same

But you know what? these brownies are jusssssssssssssssssssst right!
I finally came up with the best brownie recipe and Betty Crocker got the boot!


These brownies are super simple to make and only require a mixing bowl. 
It's a small batch recipe, making 16 small or 9 large brownies so feel free to double it! 

The Best Brownie Recipe
also known as the only brownie recipe you'll ever need 
makes 16 small/9 large brownies

115g butter, melted 
1C brown sugar
1 tsp vanilla extract
2 eggs
1/2C flour 
1/3C cocoa powder
1/4 tsp baking powder

Preheat oven to 180*C/350*F
Grease and line 9x9'' brownie tin.
Combine melted butter, brown sugar and vanilla in a mixing bowl.
Once butter mixture is cooled slightly, add eggs and stir until mixed through
Mix in flour, cocoa powder and baking powder until well combined.
Pour into tin and bake for 20-25 minutes, or until a skewer removes clean.


This brownie recipe is super simple to adapt, 
I added Reese Peanut Butter Chips but you can add nuts/chocolate/chopped candy bars or whatever you fancy!
They're delicious on their own or with a creamy chocolate frosting on top - it's up to you! 

So tell me - your dream brownie, what's it like?
Chewy? Fudgy? Cake-like? Nut filled? Super rich?
 Pin It

Thursday, November 24, 2011

Comfort Food Recipe: Quick Stove top Rice Pudding


Cold, dreary weather always leaves me wanting warm food to warm me from the inside out. 
Rice pudding is one of these foods that leave you feeling all cozy and snug,
however, the baked version can leave you waiting for hours!

Lately, Sydney has been having unseasonably cold, wet and dreary days.
This called for a steaming hot batch of rice pudding to warm up my family.
Plus, it gave me an excuse to stand close to the hot stove and warm up.

This recipe is super easy and is perfect for any time. 
It uses ingredients that you most likely have lying around your kitchen, so it's fantastic for a last minute dessert or a lazy day. 

Stove top Rice Pudding
Serves 4

100g long grain rice 
2C milk (you can use whole/light/skim/whatever)
1-2 tbsp sugar (depending on tastes)
2 tsp vanilla extract
1/4 tsp Cinnamon (or more/less/different spices - depending on tastes)
1C milk 
Optional: a touch of cream

In a medium saucepan, add the rice, 2 cups of milk, sugar, cinnamon and vanilla extract and bring to the boil. 
Cover and reduce to a low heat, leaving the rice to simmer for 15 minutes - stirring every now and again. 
Add in the 1 cup of milk and bring the heat up to high. 
Stir the rice constantly for around 7 minutes, until your desired consistency is reached - let the milk absorb fully for a thicker pudding or leave some milk for a creamier pudding. 
If using, stir in the cream . Transfer the pudding to bowls or a serving dish and leave to cool slightly before serving.

Tell me, 
What's your comfort food of choice?
or go-to cold weather dish? 
 Pin It

Saturday, October 1, 2011

Recipe: Key Lime Pie Cupcakes


When your Mum comes home from a trip to your Grandmother's house with a big bag of fresh limes,
What do you do?
You switch on your brain and start figuring out what you're going to bake with them, of course!

While I may have given up gluten for now, you don't think I'd stop baking - did you? 

The first thing that came to mind when I saw the limes was key lime pie,
but lately I've made quite a few pies so I felt like making something different.
I remembered I hadn't made cupcakes for a while and then the idea hit me...
Why not take a Key Lime Pie and turn it into cupcakes?

Then I set off to create Key Lime Pie Cupcakes or Lime Meringue Pie Cupcakes - whichever name you fancy.
I took my favourite, tried and tested Vanila Cupcake recipe,
made a simple lime filling and topped it off with a soft meringue.

For something that looks a little fancier than your average cupcake and will wow your guests,
it's delightfully simple - just how I like it!


Key Lime Pie Cupcakes 
recipe by ksayerphotography
Makes 12 cupcakes

Vanilla Cupcakes:
125g Butter, softened 
2/3C + 2 tbsp Sugar
2 Eggs 
1/2C Milk 
1/2 tbsp Vanilla Extract
1 1/3C Plain Flour 
3/4 tsp Baking Powder
1/4 tsp Salt

Preheat oven to 160*C (320*F).
Beat butter and sugar until light and fluffy. 
Add in eggs one at a time, beating for a minute after each egg. 
In a bowl combine milk and vanilla.
In a separate bowl combine flour, baking powder and salt. 
With a mixer on low speed, alternatively add the flour and milk mixtures until all is combined. 
Beat for a further 3 minutes on high.

Divide into lined cupcake pans and bake for 20-30 minutes or until golden and a skewer inserted into the middle comes out clean.
Using  piping nozzle, skewer or small knife make a hole in the top of the cupcakes for the filling.
Allow to cool in the pans for 10 minutes before removing to cool completely on wire racks.
Key Lime Filling:
100g Condensed Milk
1.5-2 Tbsp Fresh Lime Juice  
(this depends on your taste preference and the strength of your limes)
Mix condensed milk and lime juice together until combined and desired flavour is reached. 
Fill/pipe filling into cooled cupcakes.

Meringue Topping:
2 Egg Whites
50g Caster Sugar
Pinch of Salt

Preheat oven to 230*C (450*F)
Beat the eggs and salt until soft peaks form.
Gradually add the sugar and beat until stiff peaks. 
The mix should be thick and glossy and the sugar should be completely dissolved.
Pipe onto cooled and filled cupcakes and bake for 5 minutes until meringue is golden.
...

And there you have it! 
It seems a bit more complicated than it actually is, but trust me, it's as easy as... well, pie!

Tips:
- Add the lime juice gradually and taste as you go so you don't add too much!
- It's easier to cook the meringue topping if you place the cupcakes back into the cleaned cupcake tins
- This recipe can be easily adapted! Switch the lime juice for lemon, fill them with chocolate or caramel instead - the possibilities are endless!

So tell me -
Do you have any favourite recipes using lime?

Wednesday, September 21, 2011

Spring has Sprung.


If you're in Australia, that is.
The sun is shining and the sky is (mostly) blue!

For me, warmer weather always brightens my mood
and my wardrobe!


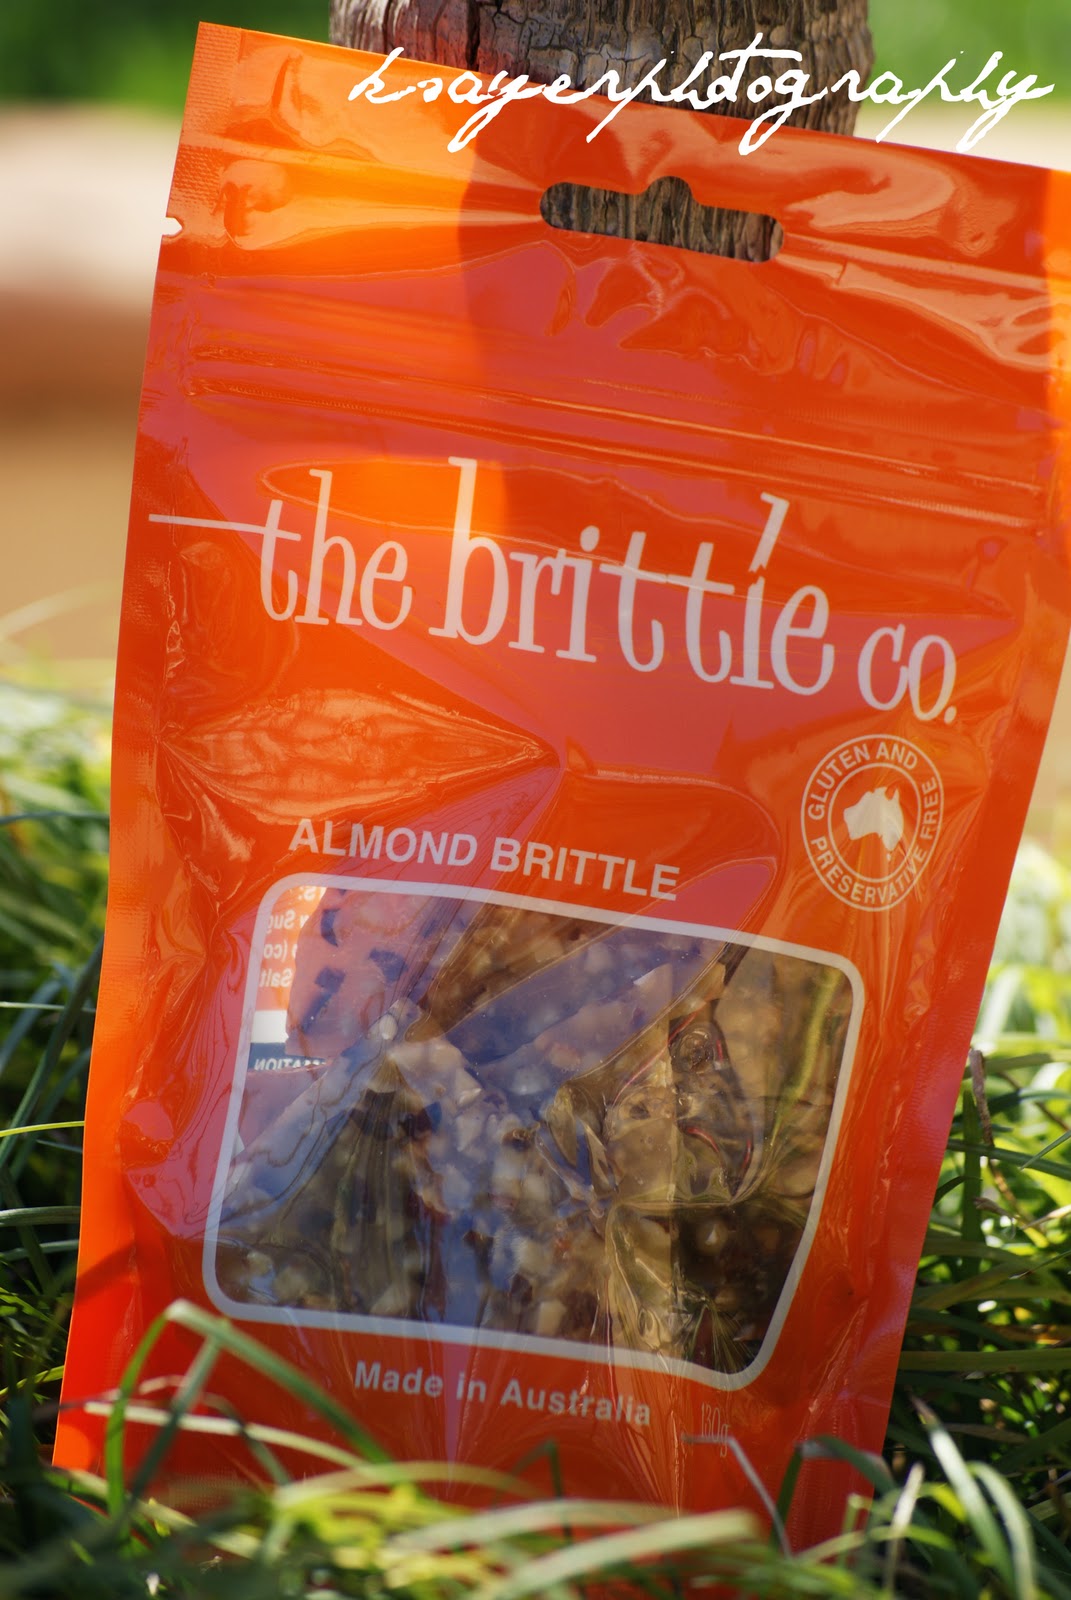
I received a package from The Brittle Co and as soon as I opened the box, their bright vibrant packaging made me instantly think of Spring!

The Brittle Co's Brittle is:
- 100% Australian owned
- Made from the highest quality ingredients
- Gluten and wheat free 
- Soy free 
- Made without any artificial additives or preservatives

The brittle is made from a recipe based on a style of sweet made by convent nuns in the mountains of the Phillippines - homeland of The Brittle Co's owner, Justine.

So now I bet you're wondering.. Did the nuns get it right?


Oh yes they did.
 The Cashew Brittle is rich and buttery with generous chunks of raw cashews 
and the Almond Brittle balances out the sweetness with diced natural almonds.

The brittle is wafer thin so you still get the crunch without having to make an appointment with your dentist!
It literally melts in your mouth and tastes just like old fashioned homemade brittle.


The Peanut Brittle was my favourite with the tonne of peanuts scattered through the rich caramel base
and the Macadamia Brittle was a hit with macadamia fans with its generous chunks of raw Queensland Macadamias.

The Brittles would be a perfect Christmas gift 
and they're delicious as an anytime treat or crumbled over ice cream and added to desserts.

The Brittle Co brittle is available at a number of local Supermarkets, Delis and other stockists as well as on their website.
If you want to find your closest stockist, send an email to: crunchy@thebrittleco.com

So tell me,
What's your go-to present when you haven't a clue what to buy someone?Chocolate? Flowers? Something funny?

Kristy received Brittle Co brittle courtesy of www.thebrittleco.com
If you'd like a review of your products, send an email to ksayerphotography@gmail.com
 

Thursday, June 30, 2011

Cookie Mad: Double Chocolate Chip Cookies (Chocolate White Choc Chip)


our new blog can be found here.

So you might have guessed that lately I've been on a bit of a cookie kick.
They're portable, adaptable, easy to make andddd I have a family of cookie fiends.

I had a request for Double Chocolate Cookies (inspired by Subway's Double Choc Chip Cookies) 
so I got to work in the kitchen. 


But that's where the trouble started. 
The recipe I had was all sorts of wrong.

As I looked down the ingredients list, I realised that it just wasn't going to work.
No eggs. No wet ingredients. No raising agents.
Hmmmmmmmmmmm.

So what did I do? Improvise!
I figured in the last couple of months I've made enough cookies to at least try to bake completely on instinct.
So I crossed my fingers and went to work. 

Once the cookies were in the oven I spent the next fifteen minutes looking from my computer screen to the oven - hoping and praying they didn't turn into a tray of cookie lava or be a complete fail.
Thankfully they didn't do either - I had soft and chewy Double Chocolate Chip cookies that smelt amazing. 

Yes, I most definitely was proud of my baking skills - fluke or no fluke :P


Being the smart cookie I am (heh)
I also wrote down what I did so I could share the recipe with you if it was a success! 
These cookies have soft centres with chewy edges and are probably the love child of a cookie and a brownie. 
If you love the chocolatey flavour of brownies but just can't go past the old faithful cookie - these are for you. 

Double Chocolate Chip Cookies  Pin It
(Chocolate White Chocolate Chip Cookies) 
recipe by ksayerphotography 
Makes about 2 dozen cookies

125g Butter
1/2C White Sugar
1/2C Brown Sugar
1 tsp Vanilla
1 Egg
Pinch of Salt
1 1/4C Flour 
1 tsp Baking Powder 
1 tsp Baking Soda
2/3C Cocoa Powder
1/3C Milk
1 1/2C White Chocolate Chips (or as much as you prefer)

Preheat oven to 165*C/330*F 
Cream butter and sugar until light and fluffy, add egg and vanilla and mix until incorporated.
Add flour, raising agents, cocoa and salt and mix until combined.
Slowly add in milk (while mixing) until a soft dough forms.
Mix in chocolate chips until evenly dispersed throughout the dough.
Cover bowl and leave to chill in the fridge for at least fifteen minutes - or until firm and workable.

Roll heaping tablespoons of dough into balls and place on lined cookie sheets 2-3" apart.
Bake for 15-20 minutes until edges are cooked. 
Leave to cool completely on trays.

Tips!
- If you want a really chocolatey cookie, switch the white chocolate chips for milk or dark.
 
- For a crispier, crunchier cookie, bake for 20-25 minutes.
- The cookies will firm up once they cool, so don't worry if the middles seem soft. 
- Try adding dried fruit/nuts/more chocolate chips to make your ultimate cookie. 
- Don't try working with the dough before you chill it, you'll end up with a huge mess.
- The dough freezes extremely well, so why not make extras and pop them in the freezer for when the cookie monster hits! 


our new blog can be found here.

So tell me, 
Are you a chocolate or a vanilla kind of person?! 

I love chocolate straight up, on it's own.
If you offered me a cake or a piece of chocolate - I'd choose chocolate :P
Or anything sweet or a piece of chocolate, really.

Pin It

Love this recipe? Be sure to check out my new blog - Southern In-Law!

Thursday, June 16, 2011

Perfectionism pays off - The ultimate Soft and Chewy Chocolate Chip Cookies

So, I'm a bit of a perfectionist.
There, I said it!

I'm not happy until a recipe is perfect
and I will never ever serve something to someone I'm not happy with.

I think being a recipe tester would probably be a dream job for me.
Testing recipes day in and day out, being paid to bake or cook and tweak recipes until they're perfect time and time again - aah!
Anyone need a recipe tester? ;)

My sister is a perfectionist's nightmare.
She will always find a little something she doesn't like or something you could've done differently.
So, being the perfectionist I am, I have been searching for her ultimate chocolate chip cookie recipe. 
Sounds easy, no? Heh.. right..


First issue? 
My sister tends to like the cookie dough more than baked cookies.
 Sure, I could just give her bowl after bowl of cookie dough, but that's not a challenge.

[Begin weeks of recipe tweaking and testing here]  

Soft cookies were the answer.
The type of cookies that stay soft even after they've cooled completely and have been sitting in a container.
But, my dear sister, also likes chewy cookies - so I had to find a cookie that had chewy edges and a ever-soft centre.

I changed flour ratios, butter ratios, chilled dough, used only egg yolks, changed baking temperatures, altered baking times and tried a million different techniques.
And then, I came up with a brilliant recipe on a whim 
(I think I need to thank the baking gods for this victory, however)

I had found THE ULTIMATE Soft Choc Chip Cookie.
Soft centres.
Slightly doughy.
Chewy edges.
Just the right amount of chocolate chips.

and best of all? 
It can be made into crunchy cookies with the perfect amount of chew just by increasing the cooking time.
Perfect for my family who is split down the middle with soft cookie and crispy cookie lovers :P


The Ultimate Soft and Chewy Chocolate Chip Cookie Recipe Pin It
makes about 2 dozen medium cookies

150g Butter, softened slightly
2/3C Brown Sugar
1/2C White Sugar
1 Egg
1 tsp Vanilla Extract
1 1/2C Flour 
1/2 tsp Baking Powder
1/2 tsp Baking Soda
1/4 tsp Salt
~1C Chocolate Chips 
(This is really a personal preference - so add however much you feel is right!)

Preheat oven to 165*C
With an electric mixer, cream butter and sugars until light and fluffy.
Add egg and vanilla and beat until incorporated.
Add in flour, baking powder, baking soda and salt and mix until incorporated.
Mix in chocolate chips until they are dispersed evenly throughout the dough.
Cover the mixing bowl with cling wrap and refridgerate for 15-30 minutes until dough is quite firm.
(Note: on my second batch I actually left the dough for 2+ hours and it worked perfectly - just took a little bit of effort to work into balls)

Once the dough has chilled, roll heaping tablespoons of dough into balls and place on a lined baking tray about 4cm/1.5 inches apart.
Bake for 10-15 minutes or until edges are cooked and golden (the centres will still be soft).
For crispy cookies: Leave for 15-20 minutes depending on your desired amount of crispiness.
Leave cookies to cool completely on trays before transferring to a container/serving tray.

Now, I'd like to tell you how long they last.
But, errr, I can't - because they don't last.
They'll be gobbled up in the blink of an eye!

So tell me, 
Are you a perfectionist in the kitchen? (or in general)
and What's one recipe you just. can't. get. 

I once spent a week having the exact same baked oatmeal breakfast every single day because I was trying to perfect my recipe. 
(This is really unusual for me - I never have the same breakfast two days in a row, 
I at least change my topping combinations :P)
But now, I have perfected it! Worth the repeat breakfasting :P


Love this recipe? Be sure to check out my new blog - Southern In-Law!

Monday, May 30, 2011

Tea and biscuits, anyone?


There's nothing better than sharing good food with friends.
A cup of tea and a biscuit? Of course!

Springhill Farm were kind enough to send me a box filled with their delicious slices and biscuits so I did what any normal person would do - turn on the kettle and round up some taste testers!

The Wildberry and Nougat Slice is a combination of Italian Nougat, dried cranberries, blueberries and raspberries and topped with white chocolate and a berry swirl. 
The soft base had a rich coconut flavour and I loved the chunks of berries, while the smooth chocolate topping melted in your mouth. 
I was actually surprised to find this was one of my favourites as I first thought it would be way too sweet, but thankfully it was jussssssssssssssssssssssst right!

The Summer Fruit slice was courteously passed over to my taste testers as I'm actually allergic to pineapple and pear, which the bar contained.
The slice is a combination of Australian dried fruits, amaranth and rice pops and topped with milk chocolate and a white chocolate swirl. 
My taste testers liked the citrus and coconut flavours and, like the nougat slice, all agreed it melted in your mouth. 
It's also Gluten Free! so it's a perfect treat for someone with a gluten intolerance.


The Lemon Lime and White Chocolate Biscuits are gluten free so they're perfect for sharing, even with your coeliac pals!
We all agreed that they definitely don't taste gluten free. 
In fact, if I didn't know otherwise, I'd have guessed it was just a regular shortbread style recipe.
It was crumbly and melted in your mouth with a delicate lemon and lime flavour. 

The Lemon and Yogurt slice combined the smooth creaminess of yogurt with the freshness of lemon that was balanced perfectly. 
Springhill Farm have been using this recipe for 20 years and I can see why!

 
The Springhill Farm journey began when Ray and Jo Barber hosted kindergarten and primary school children for a sensory filled farm visit experience in 1983. 
At the end of a day filled with horse and tractor rides, milking and collecting eggs, the children got to experience farm style cooking whilst sampling Jo's homemade muesli slice.
The slice was so popular that Jo began producing it to sell and the Muesli and Honey slice is the original recipe enjoyed by the children on the farm visits.
It's obvious why it was a hit! It's filled with whole grains, honey and Australian dried fruits and it topped with a creamy yogurt swirl.
I loved the crispiness of the oats against the soft bursts of raisins and dried fruit. 

It's safe to say that the Toasted Muesli biscuit is delicious and most definitely one of my clear favourites.
The moist biscuit is filled with chewy fruit pieces and crunchy rice bran flakes.
The crunch of the rice bran flakes is definitely what made the biscuit for me - it took it from a boring old cookie to something you could enjoy time and time again.
We decided if you gave us a lifetime supply of these biscuits, we'd be as happy as a pig in mud on the Springhill Farm!


Springhill Farm has chocoholics covered too with their Chocolate and Oat slice and Macadamia and Chocolate Chunk biscuit.

The Chocolate and Oat slice was also one of my favourites, so much so, that if you had me choose between the slice and the Muesli biscuit I don't think I'd be able to make up my mind! 
The soft oat base has a delicious coconut flavour and is filled with chocolate chips and delicious Australian Sultanas. It melts in your mouth, especially with the generous layer of chocolate sitting on top! 
This is Springhill Farm's best seller and there's no doubting why!

The Macadamia and Chocolate Chunk biscuit is for the serious chocolate lover!
The chocolate biscuit base is filled with chunks of dark chocolate and Australian macadamias.
It is the perfect accompaniment to a hot cup of tea or coffee!


The Cranberry Pistachio and White Chocolate biscuit was generously filled with chewy dried cranberries and crunchy pistachios and drizzled with a white chocolate swirl.
All of the ingredients match perfectly, creating a delicious biscuit!

The Vanilla Chocolate Chunk biscuit isn't just your average chocolate chip cookie!
The delicious vanilla biscuit is filled with generous chunks of creamy milk chocolate and topped with an extra chocolate drizzle.
I was actually surprised when I realised the biscuit was gluten free because you could never tell!
It melted in your mouth with a shortbread like texture and we all agreed it was an extremely high quality treat! 

All of these biscuits and slices were fantastic and I would happily serve them to my friends again!
(and I'm sure they would be equally as pleased :P) 
You can have Springhill Farm products delivered straight to your door by ordering online!

So tell me, 
Are you a city person or a country person? 
and what's your favourite food to share with friends?

Kristy received Springhill Farm products courtesy of www.springhillfarm.com.au
If you'd like a review of your products, send an email to ksayerphotography@gmail.com